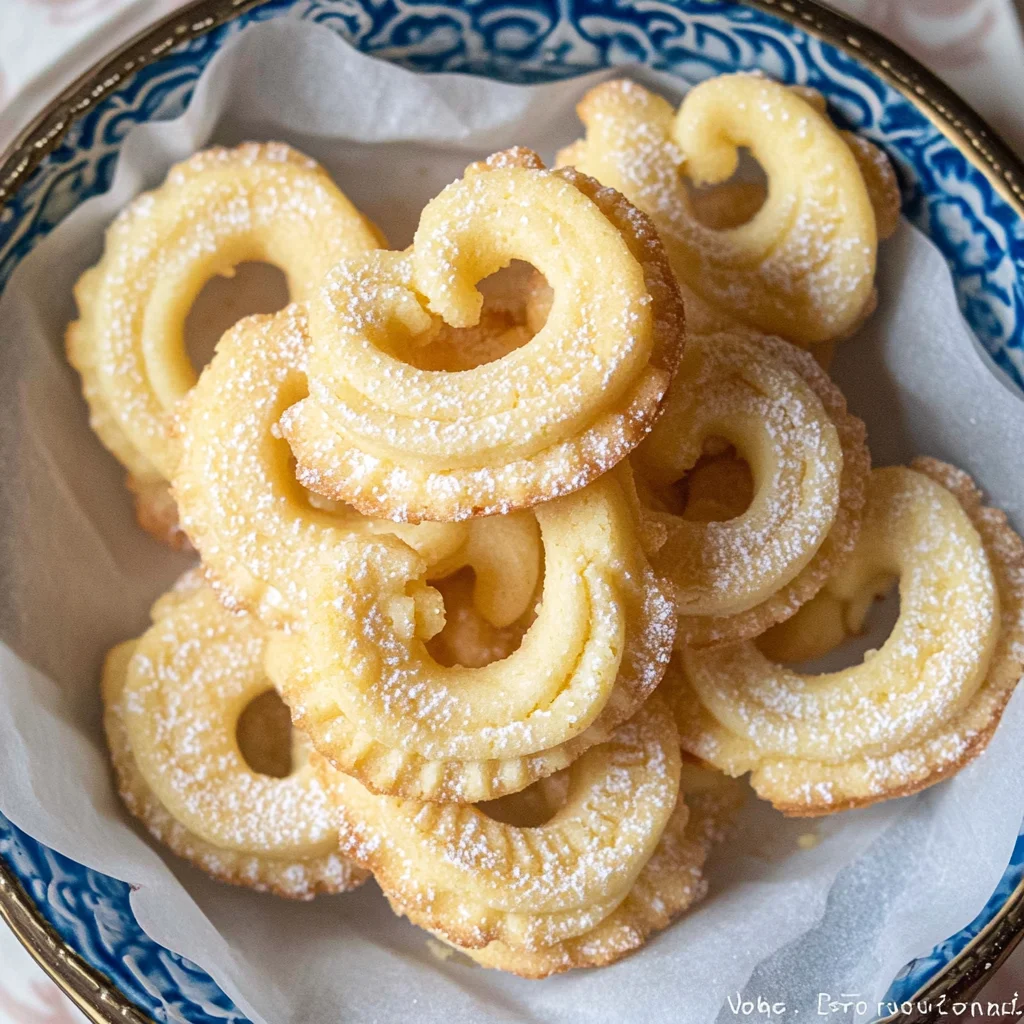
There’s nothing quite like biting into a Danish Butter Cookie, where the rich, buttery flavor melts in your mouth, leaving you craving more. Each cookie is a delightful experience—crispy, savory, sweet, and loaded with just enough protein to make you feel good about indulging. I created this recipe during one of those busy weeks when my family needed a little extra comfort in their lives, and with only 150 calories per cookie, they felt like a guilt-free treat. The goal was to bring a taste of tradition into our home while ensuring we had a delicious and protein-packed snack on hand.
I still remember the first time I made these Danish Butter Cookies for my kids. It was a chilly Sunday afternoon, and as the cookies baked, the warm aroma filled our kitchen. My youngest turned to me and exclaimed, “Mom, it smells like Christmas!” That day, I decided to add a hint of almond extract to the classic recipe, giving it a unique twist that set it apart from other cookies. The moment I pulled them out of the oven and presented them on a platter, my teenagers devoured them in seconds and begged for more, declaring them their new favorite treat!
Ingredients for the Danish Butter Cookies
Each ingredient in this dish plays an essential role in flavor and texture. Here’s what you’ll need:
1 cup unsalted butter (softened): Provides a rich, creamy base that creates the signature buttery flavor.
1/2 cup granulated sugar: Sweetens the cookies while contributing to their tender texture.
2 cups all-purpose flour (sifted): Forms the structure of the cookies, ensuring they hold their shape.
1/4 teaspoon salt: Balances sweetness and enhances the overall flavor profile.
1 teaspoon vanilla extract: Infuses a warm, inviting aroma and depth of flavor to each bite.
1/4 cup colored sugar (for decoration): Adds a festive touch and a bit of crunch to the cookies’ surface.
- 1/4 cup chopped nuts (optional): Introduces a delightful crunch and nutty flavor for added texture.
Step-by-Step Instructions
I recommend starting by preheating your oven to 350°F (175°C) since this allows the oven to reach the right temperature while you prepare the cookie dough. This way, everything will be ready to go when you’re done mixing, ensuring a seamless baking experience.
Step 1: Preheat your oven to 350°F (175°C). This step is essential because a properly heated oven helps the cookies bake evenly and achieve that perfect golden-brown edge. While the oven warms up, you can focus on making the dough without any delays later.
Step 2: In a mixing bowl, cream together the softened butter and granulated sugar until light and fluffy. This usually takes about 2-3 minutes with an electric mixer on medium speed. I find that setting a timer for this step ensures you don’t rush it; proper creaming creates air pockets that make your cookies tender and airy.
Step 3: Add in the vanilla extract and mix well until fully incorporated. The aroma of vanilla adds a delightful scent to your dough, so I like to use pure vanilla extract for an extra flavor boost. Don’t skip this step; it really elevates the overall taste of your cookies!
Step 4: Gradually add the sifted flour and salt, mixing until just combined. Be careful not to overmix at this stage; otherwise, your cookies may turn out tough instead of tender. I usually fold in the flour gently with a spatula once it starts coming together—this keeps the texture light and crumbly.
Step 5: Transfer the dough to a piping bag fitted with a star tip. This technique allows for beautifully shaped cookies that are visually appealing. If you don’t have a piping bag handy, you can also use a zip-top bag with one corner snipped off—you’ll still achieve lovely shapes without any extra equipment.
Step 6: Pipe the dough onto a baking sheet lined with parchment paper in your desired shapes. Aim for uniform sizes so they bake evenly—about 2 inches apart is ideal. If you’re feeling creative, try using different shapes or swirls! I’ve found that using parchment paper makes cleanup easier too, plus it prevents sticking.
Step 7: Sprinkle each cookie with colored sugar or chopped nuts if desired. This step not only adds visual flair but also gives a little crunch when you bite into them. My family loves adding nuts for extra texture, but if you’re looking for something more festive, colored sugar is always a hit during holidays!
Step 8: Bake in the preheated oven for 12-15 minutes or until the edges are lightly golden. Keep an eye on them towards the end; they can go from perfectly baked to overdone quite quickly! The cookies should be firm around the edges but still soft in the center when you take them out.
Step 9: Remove from the oven and let cool on a wire rack. Allowing them to cool on a wire rack prevents sogginess, as air circulates around them. It’s tempting to eat them warm right away—I get it! But letting them cool completely makes for better flavor and texture when you finally dig in.
What to Serve with Danish Butter Cookies
This dish is already incredibly filling and balanced, but these sides add extra variety and nutrition to round out your meal perfectly.
Citrus Kale Salad: A fresh kale salad tossed with a zesty lemon vinaigrette, orange segments, and sunflower seeds provides a crisp contrast to the rich butteriness of the cookies. The citrus notes brighten up the sweetness while adding a healthy dose of vitamin C and fiber. I love serving this salad as a refreshing side during holiday gatherings, where it complements the cookies beautifully without overwhelming their delicate flavors.
Coconut Quinoa: Fluffy quinoa cooked in coconut milk creates a subtly sweet and creamy side that echoes the buttery richness of the Danish Butter Cookies. With about 8 grams of protein per cup, this dish not only enhances your meal’s staying power but also adds healthy fats from the coconut. It’s a family favorite at brunches when I want to include something hearty yet delicious alongside our treats.
Avocado Toast: Creamy avocado spread on whole-grain bread topped with a sprinkle of sea salt and crushed red pepper flakes offers a satisfying textural contrast to the crispness of the cookies. The healthy fats from the avocado complement the rich flavors of the cookies while also providing essential nutrients like potassium and fiber. My kids love this as an afternoon snack option, making them feel full without spoiling their appetite for dessert.
Spiced Apple Compote: A warm compote made from sautéed apples with cinnamon and nutmeg adds a lovely spiced flavor profile that pairs well with Danish Butter Cookies’ vanilla notes. This comforting side is not only delicious but also provides antioxidants and dietary fiber from the apples. It’s perfect for cozy family gatherings, where we can enjoy it warm alongside our cookies for an extra indulgent treat.
Storage & Serving Tips

To store your Danish Butter Cookies effectively, place them in an airtight container at room temperature. They will stay fresh for up to one week. If you have not decorated the cookies yet, keep the colored sugar and chopped nuts in separate small containers to maintain their texture and flavor. This way, when you’re ready to serve, you can add the toppings fresh, ensuring that your cookies retain their buttery crispness.
When reheating, avoid using the microwave as it makes the cookies soft and disappointing. Instead, preheat your oven to 350°F and place the cookies on a baking sheet for about 5-7 minutes until warmed through. This method will help restore their delightful texture. If you’ve made dough ahead of time and stored it in the fridge, you can bake it directly from cold; just add a minute or two to the baking time for perfectly baked cookies.
Pro tip: To batch cook your Danish Butter Cookies for meal prep, consider making a double batch on Sunday. Portion them into containers so family members can grab a few whenever they want a snack. For variety throughout the week, swap out the colored sugar for sprinkles or drizzle with melted chocolate instead. To keep your toppings at their best during storage, always add the chopped nuts right before serving to maintain their crunch.
Conclusion
These Danish Butter Cookies have become a regular rotation recipe for me, as I make them at least twice a month because they’re deliciously rich and buttery while offering 150 calories each. The generous use of unsalted butter is what truly sets this recipe apart, giving the cookies their melt-in-your-mouth texture that you won’t find in store-bought versions. Give this one a try this week. I promise it’ll become a regular rotation treat in your house too.
Danish Butter Cookies
Ingredients
Method
- Preheat the oven to 350°F (175°C).
- In a mixing bowl, cream together the softened butter and sugar until light and fluffy.
- Add the vanilla extract and mix well.
- Gradually add the sifted flour and salt, mixing until just combined.
- Transfer the dough to a piping bag fitted with a star tip.
- Pipe the dough onto a baking sheet lined with parchment paper in desired shapes.
- Sprinkle with colored sugar or chopped nuts if desired.
- Bake in the preheated oven for 12-15 minutes or until the edges are lightly golden.
- Remove from the oven and let cool on a wire rack.


Leave a Comment