There’s nothing quite like the aroma of freshly baked Garlic Bread Rolls wafting through your kitchen, beckoning everyone to gather around the table. These rolls are not just deliciously soft and buttery; they’re crispy, savory, fresh, and loaded with a comforting warmth that fills your heart and stomach. I created this recipe during a particularly busy week when I needed an easy side dish to elevate our family meals without sacrificing flavor or nutrition. With only 180 calories per roll, these little gems offer a satisfying bite that pairs beautifully with everything from pasta to soups, ensuring I can keep my meal prep on track while enjoying some much-needed protein.
I still remember the first time I made these Garlic Bread Rolls for my family; it was a chilly Sunday evening, and we had just come back from a long day of soccer games. As I pulled them out of the oven, my teenager sniffed the air and exclaimed, “Wow, Mom! What’s that amazing smell?” I watched as they dove into the rolls, slathering them with garlic butter, their eyes lighting up with delight after each bite. The twist in this recipe? A hint of fresh parsley that adds a burst of flavor unlike any typical garlic bread. That night ended with my youngest asking for seconds and my husband insisting that these should be a weekly staple at our dinner table—definitely a sign of success!
Ingredients for the Garlic Bread Rolls
Each ingredient in this dish plays an essential role in flavor and texture. Here’s what you’ll need:
Dough Ingredients
2 cups All-purpose flour: Provides the structure and soft texture of the rolls.
1 packet Active dry yeast (2 1/4 teaspoons): Essential for leavening, creating fluffy rolls.
1 teaspoon Sugar (to activate yeast): Helps to feed the yeast, enhancing its rise.
1 teaspoon Salt: Balances flavors and strengthens the dough.
3/4 cup Warm water (110°F/43°C): Activates the yeast and hydrates the flour for proper dough formation.
2 tablespoons Olive oil: Adds richness and keeps the rolls tender.
Garlic Butter Topping
1/2 cup Unsalted butter (melted): Infuses the rolls with a rich, buttery flavor.
4 cloves Garlic (minced): Delivers a robust garlic essence that elevates each bite.
2 tablespoons Fresh parsley (chopped): Adds a fresh, vibrant note and color to the topping.
1/4 teaspoon Salt: Enhances the overall flavor of the garlic butter mixture.
Step-by-Step Instructions
I recommend starting with the yeast mixture first since it takes a few minutes to activate, allowing you to prepare the rest of the dough while it works its magic.
Step 1: In a mixing bowl, combine the warm water (110°F/43°C), sugar, and active dry yeast. Let it sit for about 5 minutes until it becomes frothy; this is an essential step to ensure your yeast is alive and kicking. If it doesn’t froth up, you’ll want to start over with fresh yeast. This little action is the foundation for soft, fluffy rolls, so don’t rush it!
Step 2: Once your yeast mixture is bubbly and aromatic, add in the all-purpose flour, salt, and olive oil. Mix everything together until a dough begins to form. You might find it easier to use your hands as you get closer to a cohesive mass—just make sure to scrape any bits stuck to the sides of the bowl. The combination of ingredients will create a delightful dough that’s begging to be kneaded.
Step 3: Transfer the dough onto a floured surface and knead for about 5 minutes until it’s smooth and elastic. This is where you build that perfect texture! Don’t skimp on this step; kneading helps develop gluten, which gives your rolls structure. If you notice your dough sticking too much, just sprinkle on a bit more flour as needed.
Step 4: Place the kneaded dough in a greased bowl and cover it with a cloth. Let it rise in a warm place for approximately 1 hour or until doubled in size. This rising time is crucial for achieving that light and airy texture we crave in garlic bread rolls, so be patient! You can speed things up by placing the bowl near a warm oven or heated area.
Step 5: Preheat your oven to 375°F (190°C). This way, by the time you’re done shaping your rolls, your oven will be ready for baking! When it’s baking time, you’ll want that heat just right to achieve that golden brown finish we all love.
Step 6: Once your dough has risen beautifully, punch it down gently to release excess air and divide it into 12 equal pieces. It helps if you lightly flour your hands before handling the dough—it makes shaping easier and keeps everything clean!
Step 7: Shape each piece into a smooth ball and place them on a greased baking sheet. I like using parchment paper here for easy cleanup later on. Make sure they have some space between them; they’ll expand as they rise again!
Step 8: Cover the shaped rolls with a cloth and let them rise for another 30 minutes. This second rise allows them to puff up nicely before baking—don’t skip this step! Trust me; you’ll appreciate those soft interiors when you take that first bite.
Step 9: While the rolls are rising, prepare your garlic butter topping by mixing melted unsalted butter, minced garlic, chopped parsley, and salt in a small bowl. The aroma alone is mouthwatering! This mixture will give your bread rolls an irresistible flavor boost.
Step 10: Once your rolls have risen again, brush them generously with the garlic butter mixture using a pastry brush or spoon—the more coverage, the better! I tend to save some of the butter for brushing right after baking for an extra layer of flavor.
Step 11: Bake in your preheated oven for about 15 minutes or until they turn golden brown on top. Keep an eye on them during those final minutes; ovens can vary quite a bit! They’ll be done when they’re beautifully colored and sound hollow when tapped lightly.
Step 12: Remove from the oven and give them one last brush with any remaining garlic butter before serving. This final touch not only enhances flavor but also adds an appealing glossiness that makes these rolls even more inviting! Enjoy every soft, buttery bite!
What to Serve with Garlic Bread Rolls
This dish is already incredibly filling and balanced, but these sides add extra variety and nutrition to round out your meal perfectly.
Caesar Salad: Crisp romaine lettuce tossed with a creamy Caesar dressing, crunchy croutons, and freshly grated Parmesan creates a refreshing contrast to the rich garlic bread rolls. The salad’s lightness complements the buttery flavor while adding fiber and vitamins A and C. My kids love the crunch of the croutons, making it a staple for our family dinners.
Lemon Herb Quinoa: Fluffy quinoa cooked in vegetable broth and tossed with fresh lemon juice, parsley, and a hint of garlic pairs beautifully with the savory notes of the rolls. This protein-packed side offers around 8 grams of protein per cup, enhancing your meal’s macro balance. It’s also a fantastic option for meal prep since it stores well in the fridge for quick lunches.
Roasted Brussels Sprouts: These Brussels sprouts are simply seasoned with olive oil, salt, and pepper before roasting until crispy and caramelized. Their nutty flavor provides a delightful texture contrast to the soft garlic rolls, while their high fiber content supports digestion. We often serve this during colder months as a family favorite alongside hearty meals.
Pesto Pasta: Al dente pasta tossed in homemade basil pesto brings an aromatic touch that echoes the garlic flavors of the rolls. This dish not only enhances your meal with healthy fats from the olive oil and nuts but also adds about 7 grams of protein per serving when combined with whole grain pasta. I often prepare this for potlucks because it’s always a hit!
Spicy Black Bean Salsa: A vibrant mix of black beans, tomatoes, onion, corn, jalapeños, and cilantro dressed in lime juice creates an exciting burst of flavor that contrasts nicely with the buttery rolls. This salsa packs about 10 grams of protein per serving while offering a kick that keeps meals lively. It’s perfect for gatherings and can be made ahead of time for added convenience.
Storage & Serving Tips
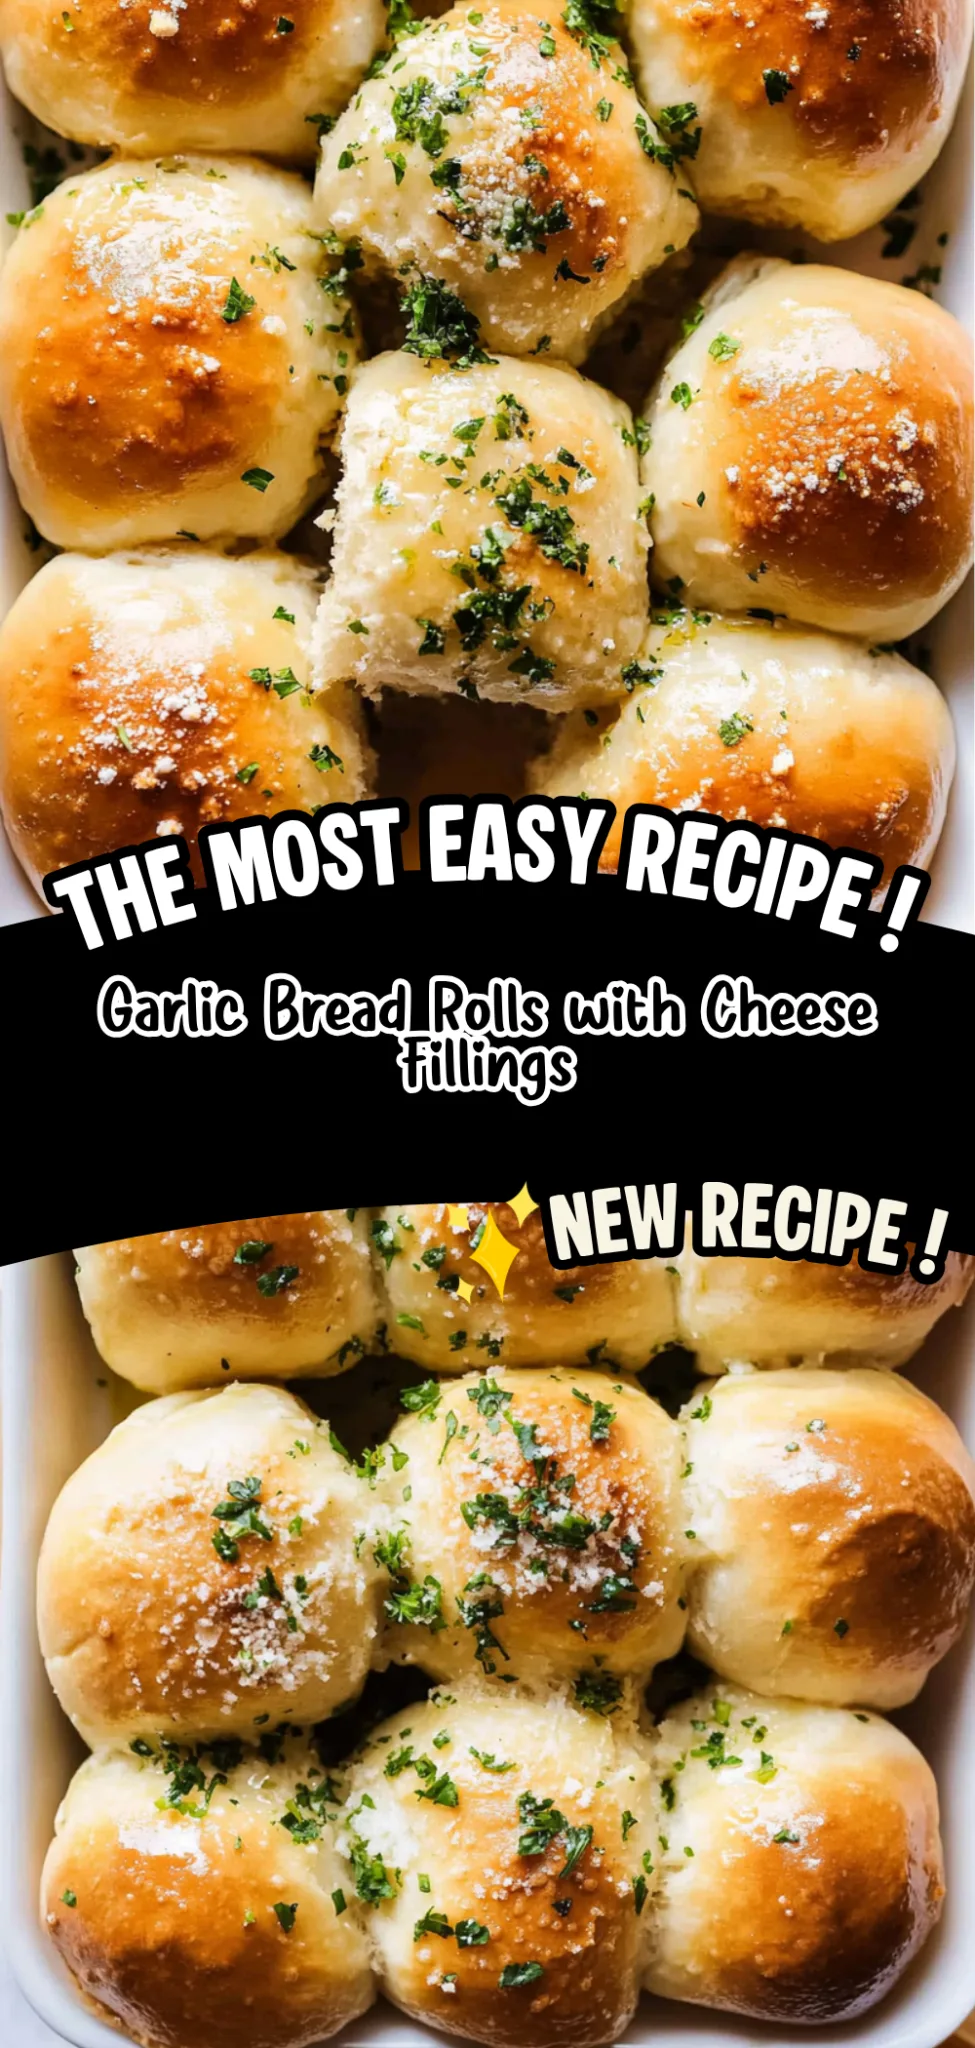
To store your Garlic Bread Rolls for meal prep, place the rolls in an airtight container and keep them in the fridge for up to 4 days. For optimal freshness, store the garlic butter topping separately in a small jar or container. The topping contains melted unsalted butter, minced garlic, chopped parsley, and salt, which can be kept in the refrigerator until you’re ready to use it. This separation helps maintain the rolls’ texture while keeping the garlic butter flavorful.
When reheating the rolls, preheat your oven to 350°F (175°C) and warm them for about 5–7 minutes until heated through. For the garlic butter topping, simply heat it in the microwave for 15-20 seconds or until it’s warm but not boiling. Avoid microwaving the rolls directly as this will make them soft and disappointing; sticking to the oven will help preserve their delightful texture.
Pro tip: If you’re looking to batch cook these rolls for the week, consider doubling the recipe on Sunday and portioning them into individual containers for easy access. Family members can self-assemble their own meals by adding their preferred toppings like extra garlic butter or fresh herbs at serving time. To mix things up throughout the week, swap out all-purpose flour with whole wheat flour or add a sprinkle of grated cheese into the dough for added flavor. To keep your garlic butter topping at its best, store it separately and only drizzle it over warm rolls right before serving—this ensures that it retains its rich buttery flavor without soaking into the bread too early.
Conclusion
These Garlic Bread Rolls have become a regular rotation recipe for me, and I find myself making them almost every week because they’re not only deliciously soft and buttery but also pack in 180 calories per roll. The secret to their irresistible texture lies in the combination of active dry yeast and warm water, which creates that perfect fluffy dough everyone loves. Give this one a try this week. I promise it’ll become a regular rotation meal in your house too.
Leave a Comment